Lesson one basically consisted of photography background, the first cameras, how film works, finding your photographers eye, blah blah blah. The assignment was to create a mat and look through it to find your eye. Ummm, no. Lesson two had a bit more about Rule of Thirds, touched on aperature (which gets you the fuzzy back ground) but the lesson was about reading the manual that came with the camera. Let me tell you, I already have. Twice. Not to mention looking things up continually. I keep it in my camera bag just in case.
Now we are on Lesson 3 and this one is about film. Considering I have a digital camera, it wasn't super relevant but did learn some interesting facts. Once again, not a lot that i didn't already know but at least the assignment included picking up my camera and taking pictures! And this is where the trouble begins. We got the option of picking either finding "rule of thirds" photos or messing with the ISO pictures.
This is an example of a rule of thirds photo:
See how C is to the left third of the pic? This is to make things more visually interesting. Not rocket science I know. You do see this "technique" a lot in current wedding photography. You know the shot...the bride and groom under the tree and the park to the side or standing on the beach. You see more ocean than couple.
The problem with taking a pic like this is that it is used a lot in portrait photography or landscape. My kids are not in the mood for pics lately and McHenry county isn't exactly the most scenic place around. I actually believe it to be some of the most uninspiring land around! It didn't help that I looked at some of the posted photography and they were really pretty and good and I felt like a dope putting up my stupid pics.
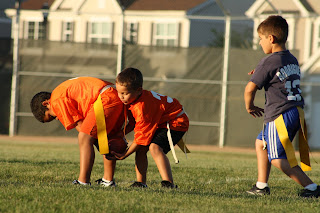
So the other option was ISO. So our instructor says take your tripod (ummm, don't have one) and head to a dark spot in the woods, or a cave or a dark candlelit church (seriously???) and take some pictures at ISO 100 vs ISO 400. OR, go to a sporting event (check) in bright sunlight (check) and take photos of relatively the same thing at 100 and again at 400 and see the difference. So I pack up my gear and head to B's flag football practice. The first shot is taken at ISO 100:
The photo below is taken at ISO 400:
Notice a difference?
Me either. Hmmm. Now what? Thank goodness there are still 9 more lessons!!


No comments:
Post a Comment